
Before You Start:
Keep your documentation close. The MyMENSCH Datasheet provides further details about the board while the W65C816i1M16SA Datasheet is for the Programmable Microcontroller built into the FPGA.
Step 1: Plug in your MyMENSCH via USB
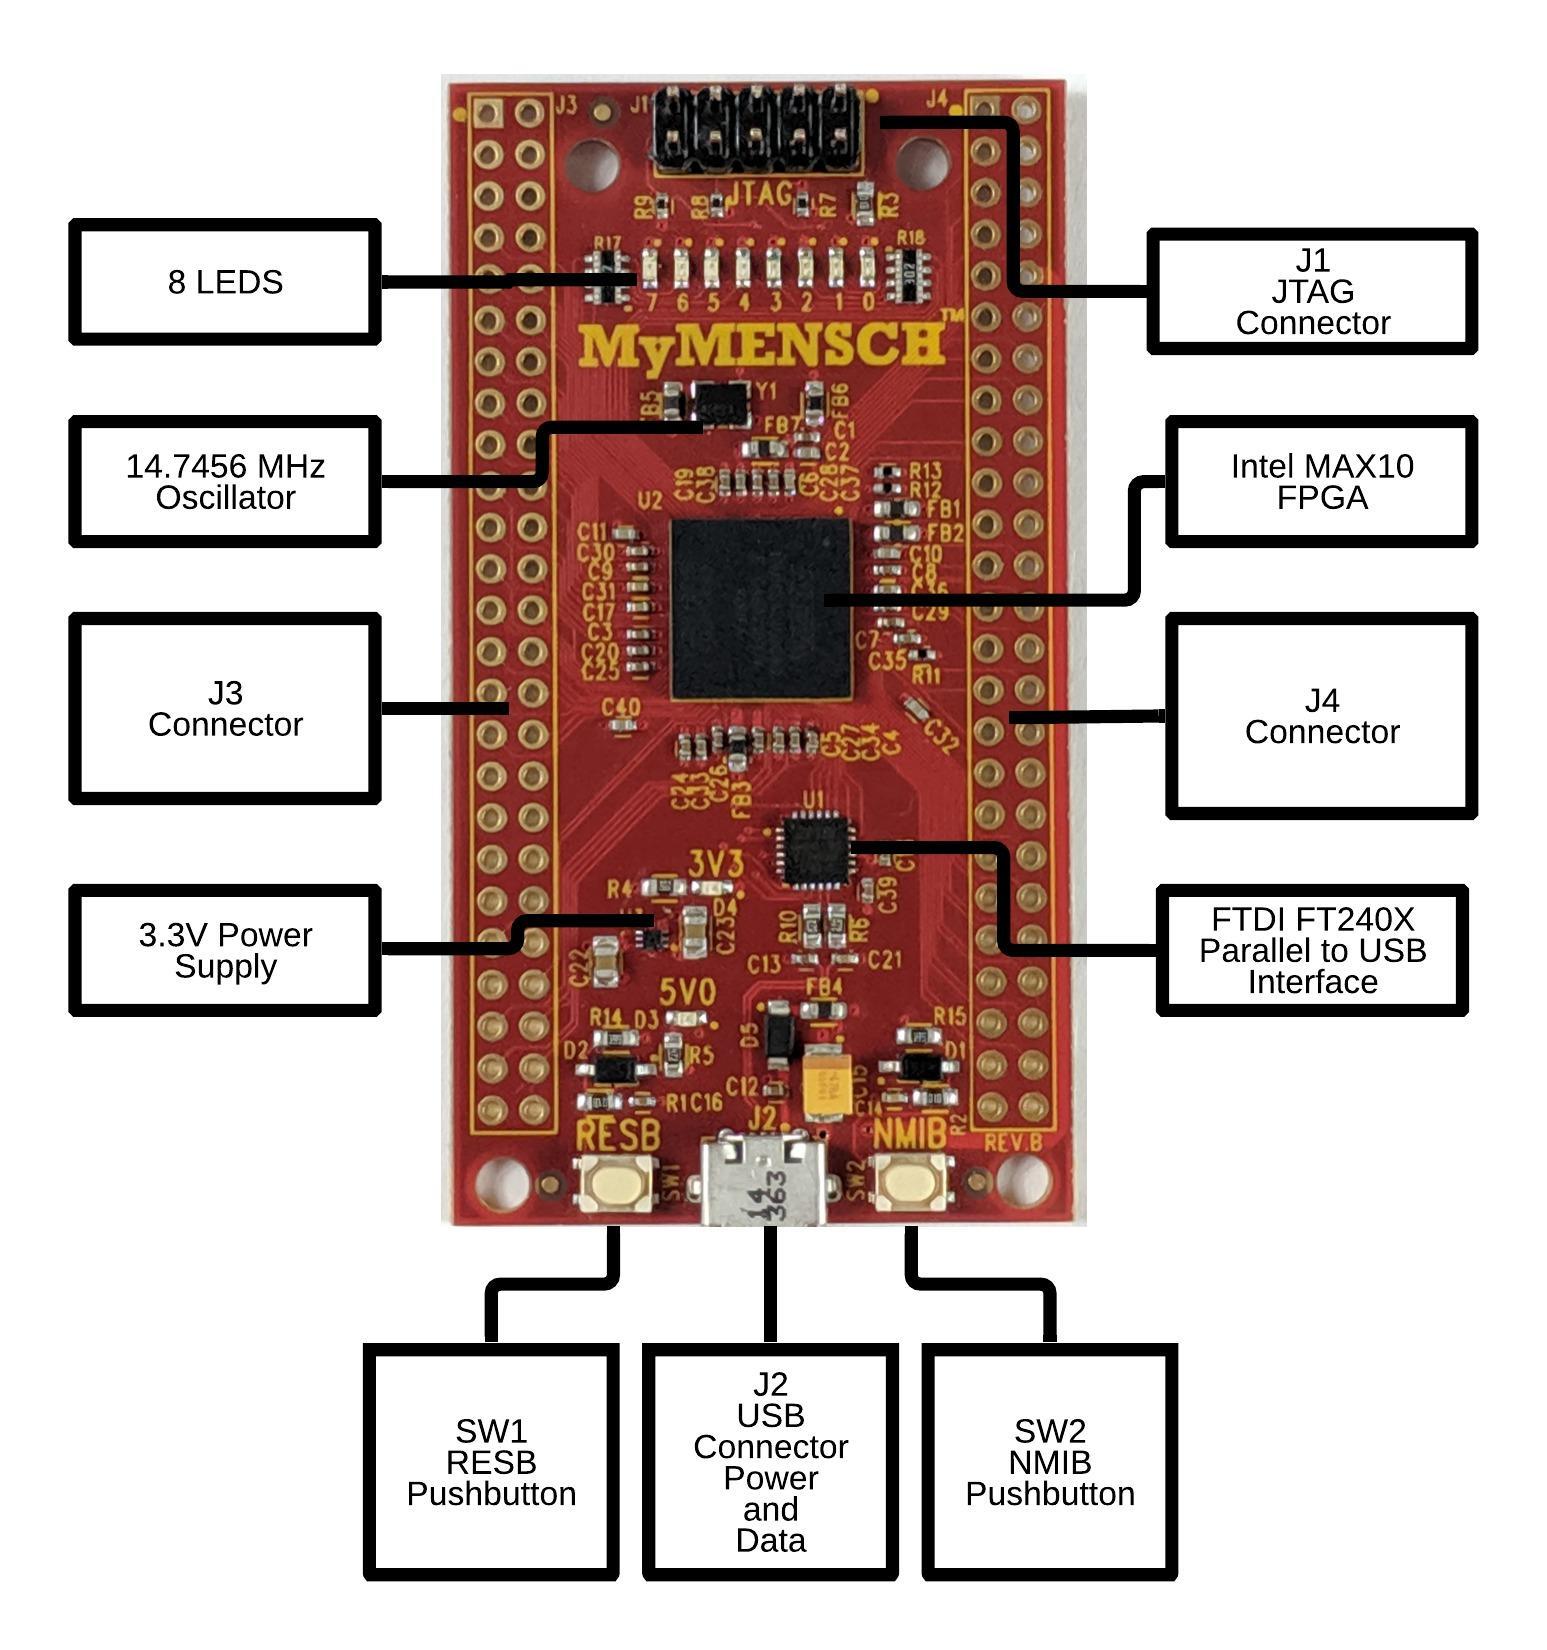
Use a micro USB cable (not included) to plug your MyMENSCH Development Board into your computer. This will both power the board and provide a WDCTools development interface. The MyMENSCH has a built-in simple operating system called a Monitor which is located in the CFM. The Monitor is always there and is the built-in interface that is all you need to get started with the WDCTools and your first project.
Step 2: Setting Up Your Coding Environment
-
Download the WDC Programming Manual
-
Download WDCTools
Install WDCTools and set update preferences with installer. WDCTools is NOT for resale or reverse engineering of our technology in any form and is NOT provided for development of commercial products that use non–WDC 65xx processors in Core or Chip form.
* Find WDCTools Support videos on YouTube -
Download D2XX FTDI Driver
-
Step 3: Running a Demo Program
- Text Editor-Select a text editor that works best for your needs is very important to ensure that your code generation works as expected. There are many options which include both commercial and free versions. We suggest if you are looking for a free editor Notepad ++.
- Batch Files – WDC provides sample batch files within WDCTools to get you started. You can find these by going into your Start Menu, scroll to MyMENSCH WDCTools and identifying the file you want to use. The batch file calls the assembler, linker, and uploader tools. If you are using Linux, you will want to create a make file with similar commands.
- Python Uploader– Once the batch file runs, the demo will assemble, link and the Uploader will launch.
- Writing your Program– You can use the included demo folder to write your own projects. Launch File Explorer and navigate to the project you want to change. The projects are within C:\WDC\MyMENSCH\. Edit the *.ASM file
- Upload Program– Once your changes to the ASM file are made, save your changes, then rerun the BAT file.
Next, we will get started with MyMENSCH Rev-B using a simple program to change the 8 LEDs on the board.

The project file is located at C:\WDC\GettingStarted\ASM\. This project has a batch file that will assemble and link the project. It will also launch WDCDB Debugger.
Before we run the BATch file, we need to know what serial port MyMENSCH is using on the PC. You can find this by opening your Windows Device Manager. You will be looking for the “Ports (COM & LPT)” section as below.

Once you know which serial port you are using, you need to edit the BATch file with a text editor. You will edit the following line:
C:\wdc\tools\bin\emc_uploader_term.exe GettingStarted.bin -d COM101 -m write -k -x -v
Change “COMXXX” to be the COM port you found in the Device Manager. For our example, we would replace the “101” with “4” so our line is now:
C:\wdc\tools\bin\emc_uploader_term.exe GettingStarted.bin -d COM4 -m write -k -x -v
Save the batch file and exit your text editor.
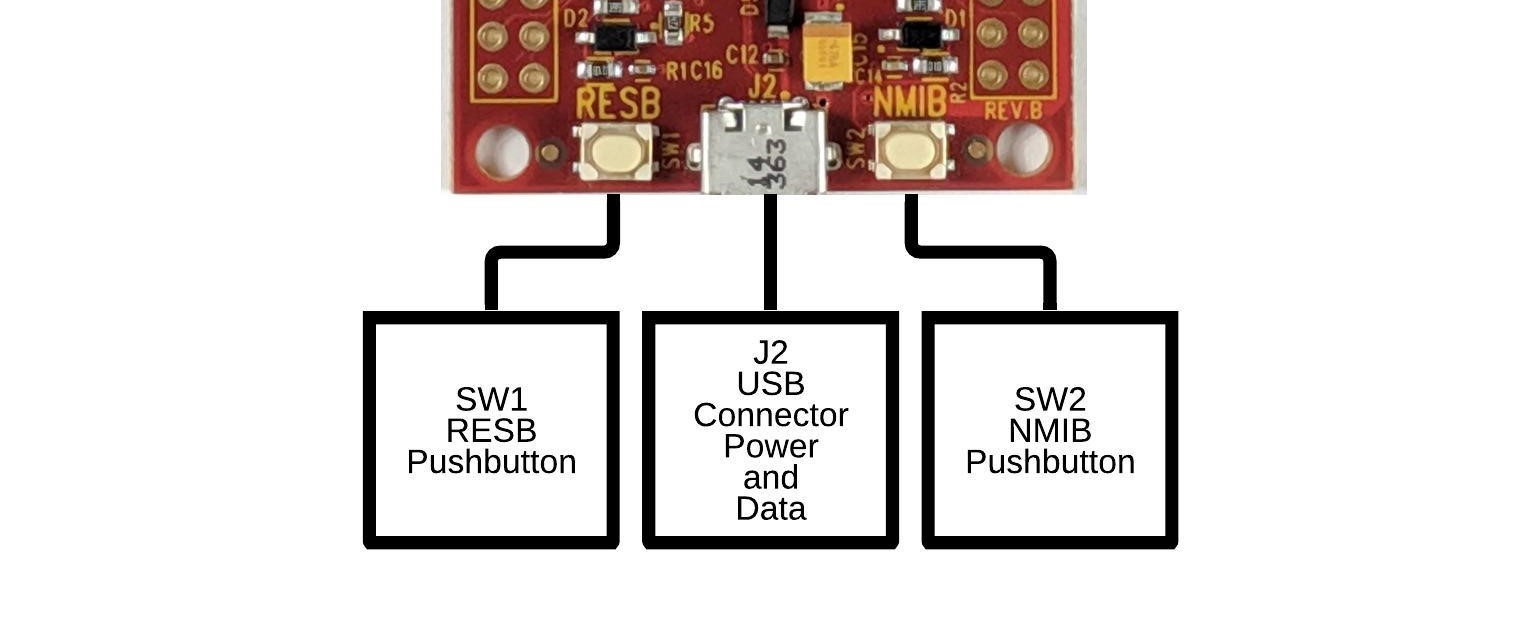
Now we will run the batch file. This next step is important. The MyMENSCH monitor has a feature that will check to see if the uploader program is trying to load new code. It does this for the first few seconds after reset. To upload a new program, you must hold the RESB reset button (SW1, see below) and then release it after you run your BATch file.
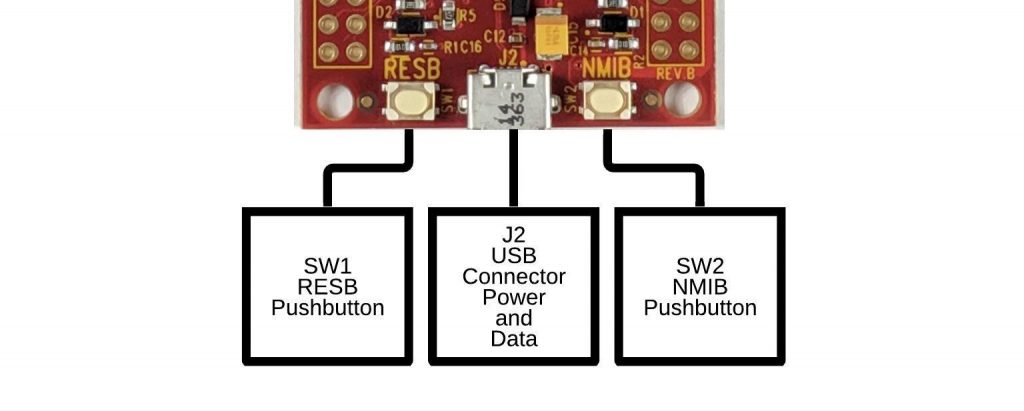
While holding the reset button, double click on the mk_GettingStarted.bat file to execute the batch file. Once the Command Prompt appears (it will do so quickly), release the reset button.

Another method to run the BATch file is to select it from the Start Menu.
It should be the same as below if everything ran correctly. The emc_uploader_term.exe is the EMC Uploader program that loads your program into FLASH or RAM. In this example, the -m write -k option is used to store the program in FLASH. The -x option will execute the code after loading, and the -v option is for verbose, which will give you more details such as a memory dump of what was written. If you run emc_uploader_term.exe -h, you will see all of the options for the program.
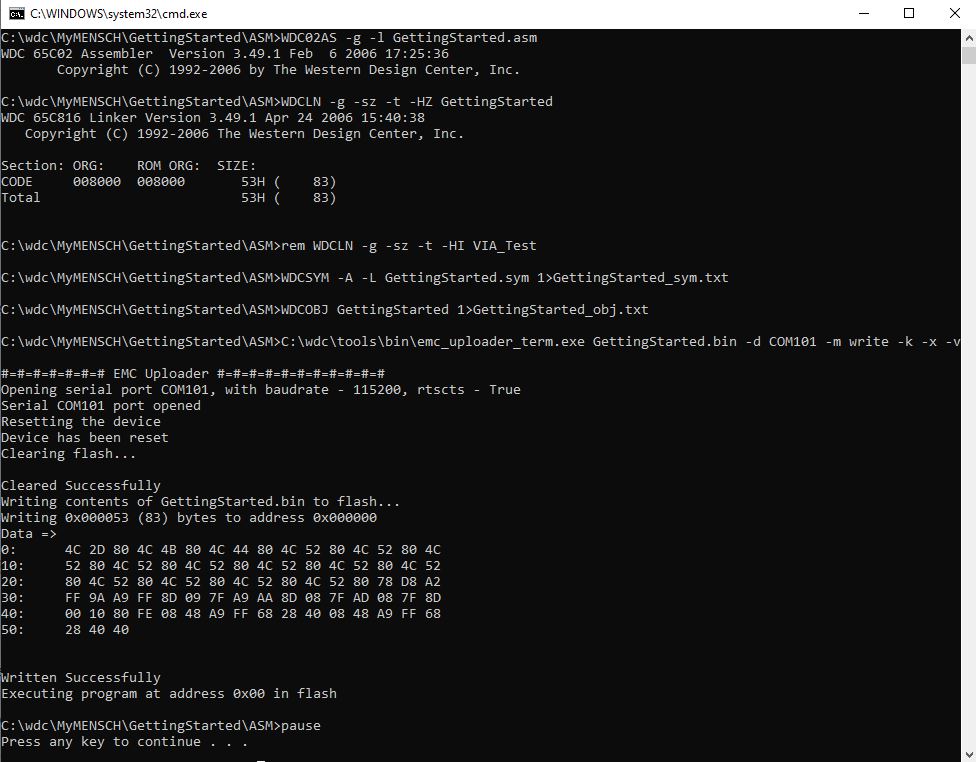
Since we used the -x option to eXecute the code, the program runs after loading. This is a simple program that sets the lights to a certain value ($AA). Therefore, LEDs 7, 5, 3, and 1 will be lit. You can change the code to make the LEDs change differently.
After this simple example, you are ready to explore the other features of MyMENSCH Rev-B and the W65C816i1M16SA FPGA Microcontroller.
Advanced Development for Commercial Products
We at The Western Design Center pride ourselves in our private and confidential relationship development. In order to best support Commercial Product Developers we have created a private GitHub and Wiki to support your product development. Access to this resource will provide you with Documentation, Design Files, and Code Examples for the W65Cx65MMC “MyMENSCH” development platform while also creating a supported relationship with the WDC business and technology development teams.
To start your Commercial Product Developer access request please download the WDC NDA below, review and sign the NDA and email it to Sales@WesternDesignCenter.com.
Advance Development Items Needed:
Hardware:
FPGA Development Tools:
Download and install Quartus Prime Lite Edition available from Intel here.
- Quartus Tools are only available for Windows and Linux.
- See the following Quartus OS and hardware requirements.
- This should include ModelSim-Intel FPGA Edition and Max 10 FPGA device support.